Blog

  • How to Enable Safe Mode on Samsung to Troubleshoot Apps

    How to Enable Safe Mode on Samsung to Troubleshoot Apps

    Your Samsung Galaxy phone is designed to be a reliable device, but sometimes, a misbehaving app can cause problems like crashing, freezing, excessive battery drain, or general system instability. When you encounter such issues, Safe Mode is an invaluable troubleshooting tool. Safe Mode on Samsung allows you to start your phone with only essential system apps running, temporarily disabling all third-party applications. This helps you determine if a recently installed app is the root cause of your phone’s issues.

    This guide will walk you through the process of enabling Safe Mode on Samsung and how to use it effectively for app troubleshooting.

    What is Safe Mode and Why Use It?

    Safe Mode is a diagnostic startup mode for Android devices. When activated:

    • Only pre-installed system apps are loaded.
    • All third-party apps you’ve downloaded are temporarily disabled.
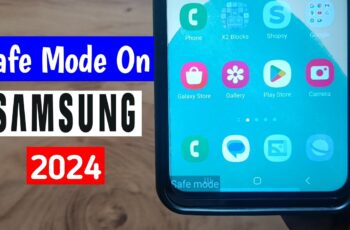
    • “Safe mode” appears as a watermark on the bottom left corner of your screen.

    Why use Safe Mode to troubleshoot apps? If your phone performs normally in Safe Mode but experiences issues in regular mode, it strongly indicates that a third-party app is the culprit. You can then systematically identify and remove the problematic app.

    Method 1: Enabling Safe Mode via the Power Off Menu (Most Common Method)

    This is the most widely used and effective method for activating Safe Mode on modern Samsung Galaxy phones.

    1. Press and Hold the Power Button:
      • Press and hold the Power button (or Side key) on your Samsung phone until the Power Off menu appears on the screen. This is the menu that usually shows “Power off,” “Restart,” and “Emergency mode.”
    2. Tap and Hold “Power off”:
      • Crucially, tap and hold your finger on the “Power off” option on the screen. Do not just tap it.
      • After a few seconds, a pop-up dialog box will appear, asking if you want to “Turn on Safe mode.”
    3. Tap “Safe mode” or “Restart”:
      • Tap the “Safe mode” or “Restart” button within the pop-up to confirm.
      • Your phone will then restart.
    4. Verify Safe Mode:
      • Once your phone restarts, you will see “Safe mode” written in the bottom left corner of your screen. This confirms you are in Safe Mode.

    Method 2: Enabling Safe Mode During Startup (Older/Alternative Method)

    This method is less common on newer Samsung devices but can sometimes work as an alternative or on older models if Method 1 doesn’t.

    1. Power Off Your Phone:
      • Completely power off your Samsung Galaxy phone.
    2. Power On and Watch for Samsung Logo:
      • Press and hold the Power button to turn on your phone.
      • As soon as the Samsung logo appears on the screen, immediately release the Power button.
    3. Press and Hold Volume Down:
      • Immediately after releasing the Power button, press and hold the Volume Down button.
    4. Keep Holding Until Boot Up:
      • Continue holding the Volume Down button until your phone fully boots up.
    5. Verify Safe Mode:
      • If successful, you will see “Safe mode” written in the bottom left corner of your screen.

    Troubleshooting Apps in Safe Mode

    Once your Samsung Galaxy phone is in Safe Mode, here’s how to identify and deal with a problematic app:

    1. Observe Phone Behavior:
      • Use your phone for a while in Safe Mode. Does it still exhibit the issues you were experiencing (e.g., crashing, freezing, battery drain)?
      • If the problem disappears in Safe Mode, it confirms a third-party app is the cause.
      • If the problem persists in Safe Mode, the issue is likely with the phone’s operating system, hardware, or a core system app. In this case, you might consider clearing system cache, performing a software update, or, as a last resort, a factory reset.
    2. Identify Recently Installed Apps:
      • Think about apps you’ve installed or updated recently, especially just before the issues started. These are often the culprits.
      • Go to Settings > Apps. You can see your list of apps. Disabled third-party apps will appear greyed out or with a disabled icon.
    3. Uninstall Suspect Apps:
      • Start by uninstalling the most recently installed apps one by one.
      • To uninstall, tap on the problematic app in the Apps list, then tap “Uninstall.”
      • Alternatively, from your app drawer in Safe Mode, you can often long-press an app icon and drag it to an “Uninstall” option.
    4. Exit Safe Mode and Test:
      • After uninstalling an app, exit Safe Mode (see next section).
      • Use your phone normally to see if the issue is resolved.
      • If the problem persists, re-enter Safe Mode and uninstall another suspect app. Repeat this process until you find the problematic app.

    How to Exit Safe Mode

    Exiting Safe Mode is usually very simple:

    • Simply Restart Your Phone: The easiest way to exit Safe Mode is to restart your Samsung Galaxy phone normally.
      1. Press and hold the Power button (or Side key) until the Power Off menu appears.
      2. Tap “Restart.”
    • Wait for Battery Drain (Last Resort): If your phone is stuck in Safe Mode and you cannot restart it normally, let the battery completely drain. Once the phone powers off due to low battery, charge it and power it on normally. It should boot into regular mode.

    Important Note: If your Samsung phone continuously boots into Safe Mode even after multiple restarts, it could indicate a more serious software corruption or a hardware issue with one of the volume buttons. In such cases, contact Samsung support or a qualified technician.

    By understanding and utilizing Safe Mode, you gain a powerful tool for diagnosing and resolving app-related issues on your Samsung Galaxy phone, saving you time and potentially preventing unnecessary factory resets.

  • How to Disable Startup Programs in Windows 11

    How to Disable Startup Programs in Windows 11

    Is your Windows 11 computer taking forever to start up? Do you find your system sluggish right after booting? The culprit is often a collection of programs that automatically launch when you turn on your PC. These are known as startup programs. While some are essential for your system, many are unnecessary and can significantly slow down your computer’s boot time and overall performance.

    Historically, managing startup items has been a core task for anyone looking to optimize their Windows experience. From the early days of msconfig in Windows XP to the integrated Task Manager in more recent versions, Microsoft has consistently provided tools to help users control what runs at startup. Understanding and managing these programs is a fundamental step in maintaining a fast and responsive computer.

    This guide will walk you through the various methods to disable startup programs in Windows 11, helping you regain control over your system’s speed and efficiency.

    Why Disable Startup Programs?

    When you install software, many applications configure themselves to launch automatically when Windows starts. This can be convenient for frequently used programs like chat apps or cloud storage clients. However, the more programs that launch at startup, the more system resources (like RAM and CPU cycles) are consumed, leading to:

    • Slower Boot Times: Your computer takes longer to become usable.
    • Reduced Performance: Your PC might feel sluggish even after it’s booted, as these background processes continue to consume resources.
    • Increased Battery Drain: On laptops, unnecessary background programs can shorten battery life.

    Disabling unneeded startup applications frees up these resources, leading to a snappier boot experience and improved overall performance.

    Methods to Disable Startup Programs in Windows 11

    There are several ways to manage your startup programs in Windows 11. We’ll cover the most common and effective methods.

    1. Using Task Manager (The Most Common Method)

    The Task Manager is your go-to tool for managing startup applications in Windows 11. It provides a comprehensive list of programs configured to launch at startup, along with their impact on your system.

    Task Manager: A system monitoring tool in Microsoft Windows that provides information about computer performance and running processes, including applications, services, and CPU usage.

    Here’s how to use it:

    • Step 1: Open Task Manager.
      • Right-click on the Start button (the Windows icon on your taskbar).
      • Select Task Manager from the context menu.
      • Alternatively, you can press Ctrl + Shift + Esc on your keyboard.
    • Step 2: Navigate to the “Startup apps” tab.
      • In the Task Manager window, you’ll see several tabs at the top. Click on the tab labeled “Startup apps” (it might be “Startup” in older Windows versions or if your Task Manager window is smaller, it might be under “More details”).
    • Step 3: Identify programs to disable.
      • You’ll see a list of applications configured to run at startup. Pay attention to the “Startup impact” column, which indicates how much a program affects your boot time (e.g., “High,” “Medium,” “Low,” or “Not measured”).
      • Look for programs you don’t need to run immediately when your computer starts. Common examples include Spotify, Discord, Adobe Creative Cloud components, or various update managers.
    • Step 4: Disable the program.
      • Click on the program you wish to disable to select it.
      • Click the “Disable” button located in the bottom-right corner of the Task Manager window.
      • Alternatively, you can right-click on the program and select “Disable” from the context menu.

    The program’s “Status” will change to “Disabled.” You can re-enable it at any time using the same process.

    1. Using Windows Settings

    Windows 11 has integrated startup app management directly into its Settings application, offering a more user-friendly interface for some.

    Windows Settings: A control panel-like application in Windows 11 that allows users to configure various system settings and preferences.

    Follow these steps:

    • Step 1: Open Windows Settings.
      • Click on the Start button.
      • Click on the Settings icon (it looks like a gear).
      • Alternatively, press Windows key + I on your keyboard.
    • Step 2: Navigate to “Apps” and then “Startup.”
      • In the Settings window, click on “Apps” in the left-hand sidebar.
      • Then, select “Startup” from the options on the right.
    • Step 3: Toggle off unwanted programs.
      • You’ll see a list of applications similar to Task Manager. Each application has a toggle switch next to it.
      • Simply click the toggle to the “Off” position for any program you want to prevent from starting with Windows.

    This method is particularly straightforward for users who prefer the modern Settings interface.

    1. Disabling Startup Programs from Within the Application Itself

    Many applications that launch at startup offer an option within their own settings to disable this behavior. This is often the most polite way to stop an application from auto-starting, as it’s designed by the software developer.

    • How it works: Open the specific application (e.g., Discord, Zoom, Spotify).
    • Look for settings: Navigate to its settings, preferences, or options menu.
    • Find startup options: Search for a section related to “General,” “Startup,” “System Tray,” or “Launch on startup.”
    • Uncheck or disable: You’ll usually find a checkbox or toggle labeled something like “Run when Windows starts,” “Launch at login,” or “Start with system.” Uncheck or disable this option.

    This method can be very effective and keeps the application’s configuration tidy. I often check here first if a new program is auto-starting unexpectedly.

    1. Using the System Configuration Utility (msconfig)

    While less commonly used for just startup programs in Windows 11 due to Task Manager’s dedicated tab, System Configuration (msconfig) is a legacy tool that still provides some control over how your system starts.

    System Configuration (msconfig): A Microsoft Windows utility used to troubleshoot the Windows startup process by selectively disabling specific services and startup items.

    • Step 1: Open System Configuration.
      • Press Windows key + R to open the Run dialog.
      • Type msconfig and press Enter.
    • Step 2: Go to the “Startup” tab.
      • In the System Configuration window, click on the “Startup” tab.
    • Step 3: Open Task Manager.
      • You’ll see a message that says “To manage startup items, use the Task Manager.” Click on the link that says “Open Task Manager.” This will directly open the “Startup apps” tab in Task Manager, bringing you back to Method 1.

    While msconfig itself doesn’t directly manage startup programs anymore in modern Windows versions, it’s worth knowing its historical significance and how it now redirects you to the Task Manager for this specific function.

    1. Checking the Startup Folders

    Windows has traditional Startup folders where shortcuts to programs can be placed to make them launch automatically. While less common for modern applications, some older or custom scripts might still use these locations.

    There are two main Startup folders:

    • User-specific Startup folder: Programs here launch only for the current user.
    • All Users Startup folder: Programs here launch for all users who log into the computer.
    • Step 1: Access the User Startup folder.
      • Press Windows key + R to open the Run dialog.
      • Type shell:startup and press Enter.
      • This will open a File Explorer window to your personal Startup folder (C:\Users\<YourUsername>\AppData\Roaming\Microsoft\Windows\Start Menu\Programs\Startup).
    • Step 2: Access the All Users Startup folder.
      • Press Windows key + R to open the Run dialog.
      • Type shell:common startup and press Enter.
      • This will open a File Explorer window to the common Startup folder (C:\ProgramData\Microsoft\Windows\Start Menu\Programs\StartUp).
    • Step 3: Delete unwanted shortcuts.
      • If you find any shortcuts to programs you don’t want to launch at startup, simply delete them from these folders.

    This method is a good troubleshooting step if you’ve tried other methods and a particular program still launches, or if you’ve installed some custom software.

    What to Avoid Disabling

    While it’s tempting to disable everything to achieve the fastest boot, some startup items are crucial for your system’s stability and security. Be cautious when disabling programs you don’t recognize.

    Generally, avoid disabling:

    • Antivirus Software: These programs need to run constantly to protect your system.
    • Graphics Drivers/Utilities: Programs like NVIDIA GeForce Experience, AMD Radeon Software, or Intel Graphics Command Center often handle display settings, updates, and performance optimizations for your graphics card. Disabling them might lead to display issues or a loss of functionality.
    • Microsoft System Components: Any program clearly labeled as a Microsoft service or a core Windows component should generally be left alone.
    • Hardware-related software: Drivers or utilities for your keyboard, mouse, or other peripherals.

    If you’re unsure about a particular program, a quick internet search for its name combined with “startup program” can usually tell you if it’s safe to disable. For instance, I once disabled a crucial audio driver’s startup component and lost sound, which took a bit of troubleshooting to resolve!

    Best Practices for Managing Startup Programs

    • Regularly Review: Periodically check your startup programs, especially after installing new software.
    • One by One: If you’re trying to identify a program causing slow boot times, disable them one by one and restart your computer to see the effect.
    • Install Mindfully: During software installation, always choose “Custom” or “Advanced” installation options if available. This often allows you to uncheck options like “Launch when Windows starts” or “Install [unwanted bundled software].”

    By taking control of your startup programs, you can significantly improve your Windows 11 experience, making your computer faster and more responsive from the moment you hit the power button.

    Frequently Asked Questions (FAQ)

    Q1: What are startup programs in Windows 11?

    Startup programs are applications or processes that automatically launch and run in the background as soon as your Windows 11 computer boots up. They are designed to be immediately available when you log in, but too many can slow down your system.

    Q2: Why is my Windows 11 computer slow to start?

    A slow startup in Windows 11 is often caused by too many startup programs running simultaneously. Each program consumes system resources like CPU and RAM, extending the time it takes for your operating system to fully load and become responsive. Other factors could include a slow hard drive or outdated drivers.

    Q3: Is it safe to disable startup programs?

    Yes, generally it is safe to disable most startup applications. However, you should avoid disabling essential programs like your antivirus software, critical system drivers (e.g., graphics card utilities), or core Microsoft services, as this could impact system stability or security. If unsure, research the program before disabling it.

    Q4: How do I find out what programs are running at startup?

    The easiest way to find out what programs are running at startup in Windows 11 is by using the Task Manager. Open Task Manager (Ctrl + Shift + Esc), then go to the “Startup apps” tab. You can also check the “Startup” section in the Windows Settings app.

    Q5: Will disabling startup programs free up RAM?

    Yes, disabling startup programs will free up RAM and CPU cycles. When a program doesn’t launch at startup, it doesn’t consume those resources in the background, making them available for other applications and improving overall system performance.

    Q6: Can I re-enable a startup program after disabling it?

    Absolutely! You can easily re-enable a startup program using the same methods you used to disable it. In Task Manager or Windows Settings, simply find the program and change its status from “Disabled” to “Enabled” or toggle the switch back to “On.”

    Q7: What is “Startup impact” in Task Manager?

    Startup impact” in Task Manager is a metric that indicates how much a particular program affects your computer’s boot time. It’s categorized as “High,” “Medium,” or “Low,” with “High” indicating that the program significantly contributes to a slower startup. This helps you identify which programs are worth disabling for the greatest performance gain.
  • How to fix a laptop that won’t turn on or charge

    How to fix a laptop that won’t turn on or charge

    Your laptop suddenly refusing to turn on or charge can be a truly frustrating experience, often leading to panic about lost data or expensive repairs. While it might seem like a dire situation, many “dead” laptops can be revived with some basic troubleshooting. The problem often lies with the power supply, battery, or a minor hardware glitch rather than a catastrophic component failure.

    This comprehensive guide will walk you through a systematic troubleshooting process to diagnose and potentially fix a laptop that won’t turn on or charge, starting with the simplest solutions and moving to more complex diagnostics.

    Understanding the “Won’t Turn On or Charge” Scenario

    When your laptop shows no signs of life (no lights, no fan noise, no screen activity), it usually points to an issue with power delivery. This could be due to:

    • Power Adapter Problems: Faulty charger, cable, or wall outlet.
    • Battery Issues: Completely drained, faulty, or disconnected battery.
    • Power Port Damage: The charging port on the laptop itself is damaged.
    • Hardware Glitches: A minor system hang or power residue causing a temporary lockout.
    • Internal Component Failure: (Less common, but possible) Motherboard, CPU, or other critical hardware failure.

    Let’s begin troubleshooting, starting with the most likely and easiest fixes.

    How to Fix a Laptop That Won’t Turn On or Charge: Step-by-Step

    Follow these steps in order to systematically diagnose and resolve the issue.

    Step 1: Check the Power Source and Connections (External Factors)

    This is the most common culprit and the easiest to rule out.

    1. Check the Wall Outlet:
      • Ensure the wall outlet you’re using is working. Plug in another device (like a lamp or phone charger) to confirm it has power.
      • Try plugging the laptop charger into a different wall outlet in a different room, ideally one you know is working.
      • If using a power strip or surge protector, bypass it temporarily and plug the charger directly into a wall outlet. The power strip might be faulty or tripped.
    2. Inspect the AC Adapter (Charger) and Cables:
      • Feel the Brick: When plugged in, does the power brick (the rectangular box on the charger cable) feel warm? If it’s completely cold and there are no indicator lights on it, it might not be receiving power or could be dead.
      • Check Indicator Light: Many power bricks have an LED indicator light. If it’s off, it indicates no power is flowing to or through the brick.
      • Inspect All Cables: Carefully examine the entire length of the power cable from the wall to the brick, and from the brick to the laptop. Look for any frays, cuts, bends, or exposed wires. A damaged cable can prevent power delivery.
      • Secure Connections: Ensure all parts of the charger are firmly plugged in: the cable into the wall, the cable into the power brick, and the barrel connector/USB-C connector into the laptop’s charging port. Tug gently on each connection to ensure it’s snug.
      • Try a Different Charger (If Available): If you have access to a known working charger that is compatible with your laptop (matching voltage, wattage, and connector type – this is crucial to avoid damage), try using it. This quickly tells you if your original charger is the problem.

    Step 2: Perform a Hard Reset / Power Cycle (Clear Residual Power)

    A “hard reset” can often resolve power-related glitches by draining any residual power from the internal components. This is a safe and effective troubleshooting step.

    1. Disconnect Everything: Unplug the AC adapter from the laptop and the wall. Remove all peripherals (USB drives, external mouse/keyboard, external monitors, etc.).
    2. Remove the Battery (If Removable):
      • If your laptop has a removable battery, unlatch it and carefully take it out.
      • Press and hold the power button on the laptop for 30-60 seconds. This drains any residual power.
      • Reinsert the Battery (if removed) and then reconnect the AC adapter.
      • Try to turn on the laptop.
    3. For Non-Removable Batteries (Most Modern Laptops):
      • With the AC adapter unplugged and all peripherals disconnected, press and hold the power button for 30-60 seconds. Some manufacturers recommend even longer, up to 1-2 minutes.
      • This forces a discharge of internal capacitors.
      • After holding, reconnect the AC adapter and try to turn on the laptop.

    Step 3: Check the Laptop’s Charging Port

    The charging port on your laptop is susceptible to damage from frequent plugging/unplugging or accidental tugs.

    1. Visual Inspection:
      • Carefully examine the charging port on your laptop. Use a flashlight if necessary.
      • Look for any bent pins (especially common with barrel connectors), debris inside, or signs of looseness/damage.
      • For USB-C ports, check for bent metal or obstructions.
    2. Clean the Port: If you see dust or debris, gently try to remove it with a can of compressed air. Do not use metal objects or sharp tools, as you could cause further damage.
    3. Test for Loose Connection: If the port feels loose when you plug in the charger, or if the charging light flickers when you wiggle the connector, the port itself might be damaged internally. This usually requires professional repair.

    Step 4: Test with Battery Removed (If Removable) or AC Power Only

    This helps determine if the battery is the culprit.

    1. If Battery is Removable:
      • Remove the battery.
      • Plug in the AC adapter directly.
      • Try to turn on the laptop.
      • Result A: Laptop Turns On: This indicates the battery is likely faulty or completely dead and needs replacement. You can operate the laptop plugged in.
      • Result B: Laptop Still Doesn’t Turn On: The issue is with the charger, power port, or internal components, not just the battery.
    2. If Battery is Non-Removable:
      • You can’t easily test without the battery. However, after performing the hard reset (Step 2), if the laptop still doesn’t turn on even when plugged in, it points away from a simple battery issue and towards the charger, port, or internal components.

    Step 5: Listen for Signs of Life / Observe Indicator Lights

    Even if the screen is black, your laptop might be showing subtle signs of activity.

    1. Listen:
      • Do you hear any fan noise when you press the power button?
      • Do you hear any beeping sounds (beep codes often indicate specific hardware failures like RAM or CPU)? Refer to your laptop’s manual for beep code interpretations.
    2. Look for Lights:
      • Are any LED indicator lights (power light, charging light, keyboard backlight) coming on, even briefly?
      • If lights come on but the screen remains black, it might be a display issue rather than a complete power failure. Try connecting to an external monitor (Step 6).

    Step 6: Connect to an External Monitor (Diagnose Display Issues)

    If the laptop seems to power on (lights, fan noise) but nothing shows on the screen, the display itself or the graphics card might be the problem.

    1. Connect External Monitor: Use an HDMI, DisplayPort, or VGA cable to connect your laptop to an external monitor or TV.
    2. Power On: Turn on the external monitor, then turn on your laptop.
    3. Switch Display Output: You might need to use a keyboard shortcut to switch the display output to the external monitor. Common shortcuts include:
      • Fn + F4 (HP, Dell)
      • Fn + F5 (Lenovo)
      • Fn + F7 (Acer)
      • Fn + F8 (ASUS)
      • Look for an icon on your function keys that resembles a monitor.
    4. Result A: Image Appears on External Monitor: This indicates your laptop is working, but the problem is with the laptop’s internal display, its cable, or the integrated graphics hardware. You can often use the laptop with an external monitor until repairs are made.
    5. Result B: No Image on External Monitor: The problem is likely more severe, involving deeper hardware issues (motherboard, CPU, RAM).

    Step 7: Check RAM (If Accessible)

    Sometimes, loose or faulty RAM modules can prevent a laptop from booting. This step is only feasible if you can easily access your laptop’s RAM slots.

    1. Power Down and Disconnect: Fully power off the laptop, unplug the AC adapter, and remove the battery (if removable).
    2. Access RAM: Carefully open the access panel on the bottom of your laptop (refer to your laptop’s service manual for instructions).
    3. Reseat RAM: Gently unclip the RAM modules and then firmly reinsert them into their slots, ensuring they are fully seated.
    4. Test One Module at a Time: If you have multiple RAM sticks, try booting with only one module installed. If it boots, try the other one. This helps identify a faulty RAM stick.
    5. Reassemble: Carefully close the access panel.
    6. Reconnect Power and Test: Plug in the AC adapter (and battery, if applicable) and try to turn on the laptop.

    When to Seek Professional Help

    If you’ve gone through all these steps and your laptop still won’t turn on or charge, it’s time to consider professional assistance. The problem likely lies with:

    • Damaged DC Jack/Charging Port: Internal damage that requires soldering.
    • Motherboard Failure: A critical component on the motherboard (power management IC, CPU, GPU) has failed.
    • Dead Battery (Non-Removable): If the battery is completely dead and prevents the laptop from booting even on AC power, it needs replacement.
    • Other Internal Hardware Failure: PSU, CPU, or GPU failure.

    A reputable laptop repair shop can diagnose the exact issue and provide a repair estimate. Be prepared that some repairs, especially motherboard replacements, can be costly.

    By systematically troubleshooting, you increase your chances of identifying and fixing the problem, potentially saving you time and money.

  • How to Create keyboard Shortcuts in Windows

    How to Create keyboard Shortcuts in Windows

    Keyboard shortcuts are a cornerstone of productivity on a computer. While you probably use Ctrl + C and Ctrl + V daily, Windows allows you to create your own custom shortcuts to launch applications, open files, or visit websites in an instant. This can dramatically speed up your workflow.

    This guide will show you how to create keyboard shortcuts in Windows, covering everything from the simple, built-in method to more powerful, flexible tools for advanced users. I’ve configured my own systems using these techniques for years, and the time saved by launching my most-used programs with a quick key press is significant.

    Method 1: The Built-in Way (For Desktop Applications and Files)

    This is the quickest and easiest way to create a shortcut for any application, file, or folder on your computer. It relies on creating a desktop shortcut first.

    Step 1: Create a Shortcut Icon First, you need a shortcut icon for the item you want to launch.

    • For an Application:
      1. Click the Start Menu and find the application you want (e.g., Google Chrome, Notepad).
      2. Click and drag the application’s icon from the Start Menu directly onto your desktop. This will automatically create a shortcut.
    • For a File or Folder:
      1. Navigate to the file or folder in File Explorer.
      2. Right-click on the file or folder.
      3. Go to Send to > Desktop (create shortcut). You should now have a new shortcut icon on your desktop.

    Step 2: Assign the Keyboard Shortcut Now we’ll assign a key combination to that new shortcut icon.

    1. Right-click on the new shortcut icon on your desktop.
    2. Select Properties from the context menu.
    3. In the Properties window, make sure you are on the Shortcut tab.
    4. Click inside the Shortcut key: box. It will likely say “None.”
    5. Press the key you want to use for your shortcut. For example, press the N key. Windows will automatically assign Ctrl + Alt + N as the shortcut key.
      • Important Note: Windows forces the Ctrl + Alt combination for these types of shortcuts to avoid conflicts with existing system-wide hotkeys.
    6. Click Apply, and then click OK.

    You can now press Ctrl + Alt + N (or whatever combination you set) at any time to launch that program or open that file. You can even delete the desktop icon afterwards, and the keyboard shortcut will still work.

    Method 2: The Power User’s Choice (Microsoft PowerToys)

    The built-in method is great, but it’s limited. For more control, Microsoft’s own PowerToys is a fantastic free tool. It allows you to create powerful, system-wide shortcuts without the Ctrl + Alt limitation.

    Step 1: Install Microsoft PowerToys

    • You can download PowerToys for free from the Microsoft Store or from GitHub. Simply search for it and click install.

    Step 2: Use the Keyboard Manager

    1. Open PowerToys from your Start Menu.
    2. In the PowerToys settings menu on the left, click on Keyboard Manager.
    3. Ensure that Enable Keyboard Manager is toggled on.
    4. Click on Remap a shortcut.

    Step 3: Create Your New Shortcut

    1. In the Remap Shortcuts window, click the + button to add a new shortcut.
    2. Under the Shortcut: column on the left, define the key combination you want to press. For example, to set Win + C to open Chrome, click “Type” and press Win + C.
    3. Under the Mapped to: column on the right, you define the action. To launch an application, select Start App from the dropdown menu.
    4. In the text box that appears, type the name of the application’s executable file (e.g., chrome.exe or notepad.exe).
    5. Click OK.

    Your new shortcut is now active. The best part about using PowerToys is that you can create much more intuitive shortcuts (like Win + C for Chrome) and manage them all from one central place.

    Method 3: The Ultimate Customization (AutoHotkey)

    For the absolute maximum level of control, power users turn to AutoHotkey. This is a free, open-source scripting language that lets you automate almost anything in Windows, including creating complex keyboard shortcuts. While it involves writing simple code, it’s easier than it sounds.

    Step 1: Install AutoHotkey

    • Go to the official AutoHotkey website (www.autohotkey.com) and download the latest version. Follow the simple installation prompts.

    Step 2: Create a Script File

    1. Go to your desktop or any folder.
    2. Right-click on an empty space.
    3. Select New > AutoHotkey Script.
    4. Give the new file a name (e.g., “MyShortcuts”). The file extension will be .ahk.

    Step 3: Write Your Shortcut Command

    1. Right-click on your new .ahk script file and select Edit script. This will open the file in Notepad.
    2. Delete any existing text in the file.
    3. Now, you can write your command. The syntax is simple: YourShortcut::Run, Action
      • ^ stands for Ctrl
      • ! stands for Alt
      • # stands for Win
      • + stands for Shift Example 1: Launch Notepad with Ctrl + Alt + N

    ^!n::Run, notepad.exe

    Example 2: Launch a website with Win + G

    #g::Run, “https://www.google.com”

    1. Save the file and close Notepad.

    Step 4: Run the Script

    • Double-click your .ahk script file. You will see an “H” icon appear in your system tray (bottom-right of your screen). This means your script is active.
    • You can now use the hotkeys you defined. To make the script run automatically when you start your computer, you can place a shortcut to the .ahk file in your Startup folder.

    By choosing the method that fits your comfort level, you can create keyboard shortcuts that save you time and make your Windows experience more personal and efficient.

  • How to Delete Samsung Free from Home Screen

    How to Delete Samsung Free from Home Screen

    Samsung Free (previously called Samsung Daily or Bixby Home) shows up when you swipe right from your main home screen on many Galaxy devices. It offers news, podcasts, and sometimes free TV, but if you’re like many users, you might find it more clutter than convenience—and want it gone.

    The thing is, Samsung Free is baked into the system, so you can’t fully uninstall it. But disabling it is simple and just as effective for removing it from your home screen and stopping it from running in the background.

    Why Disable Samsung Free?

    Disabling Samsung Free can:

    • Cut down clutter: Remove that extra home screen panel you probably don’t use.
    • Smooth your home screen flow: Avoid accidental swipes into Samsung Free.
    • Free up a bit of resources: It’s minor but can help reduce background activity.
    • Simplify your setup: Many just prefer a cleaner, minimalist home screen.

    How to Disable Samsung Free (Step-by-Step)

    1. Go to your home screen: Start at your main screen with your apps and widgets.
    2. Long-press an empty spot: Tap and hold on a blank area (not on an app or widget) to enter home screen edit mode. Your screen will zoom out slightly.
    3. Swipe right to Samsung Free: Swipe to the leftmost home screen panel—this is usually Samsung Free.
    4. Toggle Samsung Free off: At the top right, tap the toggle switch to disable it. The panel will grey out or disappear.
    5. Exit editing mode: Tap anywhere on the screen or press back/swipe up to leave edit mode.
    6. Confirm it’s gone: Try swiping right from your main home screen—the Samsung Free panel should no longer appear.

    What if You See Google Discover Instead?

    Some newer or updated Galaxy phones use Google Discover on the leftmost panel instead of Samsung Free. The disabling process is basically the same:

    1. Long-press a blank home screen area.
    2. Swipe right to the leftmost panel.
    3. You’ll see a toggle for “Media page” or an option to choose between Google Discover and Samsung Free.
    4. Toggle the media page off or select “None” if available to remove it.

    How to Re-enable Samsung Free

    Changed your mind? No problem:

    1. Long-press a blank space on your home screen.
    2. Swipe right to the leftmost panel.
    3. Toggle Samsung Free back ON at the top right.
    4. Exit edit mode.

    Minimizing Samsung Free’s Impact Beyond the Home Screen

    Even when disabled, Samsung Free still lives on your phone. To reduce its background activity or customize it:

    • Manage content channels:
      1. Open Samsung Free from the app drawer (may be hidden after disabling).
      2. Tap the three-line menu icon > Settings > Manage channels.
      3. Turn off content categories you don’t want.
    • Restrict background battery use:
      1. Go to Settings > Apps > Samsung Free > Battery.
      2. Select Restricted or enable Optimize battery usage.
    • Clear cache or reset data:
      1. Go to Settings > Apps > Samsung Free > Storage.
      2. Tap Clear cache (safe, no data lost).
      3. Optionally, tap Clear data to reset the app completely (your preferences will be lost).

    Disabling Samsung Free is a quick way to declutter your home screen and regain control of your Samsung Galaxy experience.

  • How to Set Custom Ringtones on Samsung Galaxy

    How to Set Custom Ringtones on Samsung Galaxy

    Tired of the same old ringtone? Setting a custom ringtone on your Samsung Galaxy phone is a fun and easy way to make your device feel more personal—and instantly know who’s calling without even looking. Whether it’s your favorite song or a unique sound clip, this guide will walk you through several simple methods to make it happen.

    Method 1: Using a Song from Your Phone’s Storage

    If you already have the audio file saved on your device, this is probably the quickest way.

    1. Open Settings: Swipe down from the top and tap the gear icon, or find the “Settings” app in your drawer.
    2. Go to Sounds and Vibration: Scroll down and tap Sounds and vibration.
    3. Tap Ringtone: Here you’ll see your ringtone options.
    4. Choose SIM Card: If you have dual SIMs, pick which one you want to assign the ringtone to.
    5. Add Your Custom Ringtone: Tap the “+” icon at the top of the ringtone list.
    6. Pick Your Audio File: Browse your files by Tracks, Albums, Artists, or Folders. Tip: The “Folders” view can be easiest if you know your song’s location.
    7. Select and Confirm: Tap your chosen file, preview it, then tap Done or OK.

    And voilà—your new ringtone is set!

    Method 2: Using the Samsung Music App

    If you prefer managing music through Samsung Music, you can set your ringtone directly from the app.

    1. Open Samsung Music from your app drawer.
    2. Find Your Song: Browse and select your favorite track.
    3. Access More Options: Tap the three dots (⋮) near the song.
    4. Set as Ringtone: Choose Set as ringtone from the menu.
    5. Pick Ringtone Type: Select Phone ringtone.
    6. Edit (Optional): You might be able to trim the song to your favorite part.
    7. Confirm: Tap Done or Set.

    Method 3: Assign a Custom Ringtone to a Specific Contact

    Want to know who’s calling just by the ringtone? Assign unique tones per contact!

    1. Open Contacts and pick a contact.
    2. Edit Contact: Tap the pencil icon.
    3. More Options: Scroll and tap More or View more.
    4. Find Ringtone: Look for the Ringtone option.
    5. Add Custom Ringtone: Tap the “+” icon and select your song from storage.
    6. Save Changes: Don’t forget to tap Save to apply the new ringtone.

    Now that contact will ring with their special tone every time!

    Troubleshooting Tips

    • File Format: Make sure your audio is in MP3, WAV, or M4A format.
    • File Location: Files should be stored on your phone or SD card, not just in the cloud.
    • Permissions: Check if your Settings or Samsung Music app has permission to access storage.
    • Restart: A quick reboot can fix minor hiccups.

    Setting custom ringtones on your Samsung Galaxy is a small tweak that makes a big difference in how your phone feels. Try it out and enjoy that personal touch every time your phone rings!

    How to Set Custom Ringtones on Your Samsung Galaxy Phone

    Tired of the same old ringtone? Setting a custom ringtone on your Samsung Galaxy phone is a fun and easy way to make your device feel more personal—and instantly know who’s calling without even looking. Whether it’s your favorite song or a unique sound clip, this guide will walk you through several simple methods to make it happen.

    Method 1: Using a Song from Your Phone’s Storage

    If you already have the audio file saved on your device, this is probably the quickest way.

    1. Open Settings: Swipe down from the top and tap the gear icon, or find the “Settings” app in your drawer.
    2. Go to Sounds and Vibration: Scroll down and tap Sounds and vibration.
    3. Tap Ringtone: Here you’ll see your ringtone options.
    4. Choose SIM Card: If you have dual SIMs, pick which one you want to assign the ringtone to.
    5. Add Your Custom Ringtone: Tap the “+” icon at the top of the ringtone list.
    6. Pick Your Audio File: Browse your files by Tracks, Albums, Artists, or Folders. Tip: The “Folders” view can be easiest if you know your song’s location.
    7. Select and Confirm: Tap your chosen file, preview it, then tap Done or OK.

    And voilà—your new ringtone is set!

    Method 2: Using the Samsung Music App

    If you prefer managing music through Samsung Music, you can set your ringtone directly from the app.

    1. Open Samsung Music from your app drawer.
    2. Find Your Song: Browse and select your favorite track.
    3. Access More Options: Tap the three dots (⋮) near the song.
    4. Set as Ringtone: Choose Set as ringtone from the menu.
    5. Pick Ringtone Type: Select Phone ringtone.
    6. Edit (Optional): You might be able to trim the song to your favorite part.
    7. Confirm: Tap Done or Set.

    Method 3: Assign a Custom Ringtone to a Specific Contact

    Want to know who’s calling just by the ringtone? Assign unique tones per contact!

    1. Open Contacts and pick a contact.
    2. Edit Contact: Tap the pencil icon.
    3. More Options: Scroll and tap More or View more.
    4. Find Ringtone: Look for the Ringtone option.
    5. Add Custom Ringtone: Tap the “+” icon and select your song from storage.
    6. Save Changes: Don’t forget to tap Save to apply the new ringtone.

    Now that contact will ring with their special tone every time!

    Troubleshooting Tips

    • File Format: Make sure your audio is in MP3, WAV, or M4A format.
    • File Location: Files should be stored on your phone or SD card, not just in the cloud.
    • Permissions: Check if your Settings or Samsung Music app has permission to access storage.
    • Restart: A quick reboot can fix minor hiccups.

    Setting custom ringtones on your Samsung Galaxy is a small tweak that makes a big difference in how your phone feels. Try it out and enjoy that personal touch every time your phone rings!

  • How to Connect Samsung Fridge to Wi-Fi

    How to Connect Samsung Fridge to Wi-Fi

    Connecting your Samsung fridge to Wi-Fi enables remote management, firmware updates, and control via the SmartThings app. Follow this guide to set up your fridge’s Wi-Fi correctly.

    Step 1: Check Wi-Fi Compatibility

    Ensure your Samsung refrigerator model supports Wi-Fi. Most Family Hub models and some Bespoke and smart refrigerators include Wi-Fi connectivity. Look for a Wi-Fi icon on the control panel or refer to the user manual.

    Step 2: Download the SmartThings App

    1. Open the Google Play Store (Android) or App Store (iOS).
    2. Search for SmartThings.
    3. Download and install the app.
    4. Sign in or create a Samsung account.

    Step 3: Prepare Your Fridge for Connection

    1. Power on the fridge.
    2. On the fridge’s display panel, tap Settings.
    3. Navigate to Wi-Fi or Network Settings.
    4. Tap Wi-Fi to start searching for available networks.

    Step 4: Connect to Wi-Fi

    1. Select your home Wi-Fi network from the list.
    2. Enter your Wi-Fi password.
    3. Tap Connect.
    4. Wait until you see a “Connected” or similar confirmation message.

    If your fridge does not show Wi-Fi options, proceed to Step 5 to connect via SmartThings.

    Step 5: Add Fridge to SmartThings (Alternative or Required for Some Models)

    1. Open the SmartThings app.
    2. Tap the “+” (Add device) button.
    3. Select Device > By brand > Samsung > Refrigerator.
    4. Follow the on-screen instructions. This typically includes:
      • Granting Bluetooth and location permissions.
      • Selecting your fridge model type.
      • Pressing Connect on the fridge display (or holding Fridge + Freezer buttons for 5 seconds if prompted).
      • Scanning the QR code (on the inside of the door or the manual).
    5. Complete the pairing process.

    Step 6: Confirm Connection

    Once setup is successful:

    • The fridge will show Wi-Fi connected on the panel.
    • You can see and control the fridge in the SmartThings app.

    Troubleshooting Tips

    • Restart your Wi-Fi router before retrying.
    • Ensure your fridge is within range of your router.
    • Use a 2.4GHz Wi-Fi network if your fridge does not support 5GHz.
    • Reset network settings from the fridge if connection fails.

    Final Notes

    • Some firmware updates might be required before Wi-Fi setup is possible.
    • SmartThings app will automatically update the fridge once connected.
    • For advanced issues, refer to the fridge’s user manual or contact Samsung support.
  • How to Update Samsung Galaxy Watch Software

    How to Update Samsung Galaxy Watch Software

    Keeping your Samsung Galaxy Watch updated ensures it performs at its best and remains secure. Here’s how to check for and install software updates, either via your phone or directly from the watch.

    Why Update?

    • New Features
    • Performance Improvements
    • Bug Fixes
    • Security Enhancements
    • Battery Optimizations
    • Better Compatibility with Samsung Phones

    Before You Begin

    • Battery: At least 30-50% charge
    • Connection: Watch must be connected via Bluetooth to your phone
    • Internet: Stable Wi-Fi or mobile data (Wi-Fi preferred)
    • Time: Allow 10-30 minutes for the process
    • Proximity: Keep phone and watch close together

    Method 1: Update via Galaxy Wearable App

    1. Connect Watch and Phone: Ensure the watch is connected via Bluetooth.
    2. Open the Galaxy Wearable App.
    3. Navigate to Watch Settings: Tap “Watch settings” or “Watch software update.”
    4. Check for Updates: Tap “Download and install.”
    5. Download and Install: If available, download the update. The phone transfers it to the watch.
    6. Watch Updates: The watch restarts and installs the update.

    Method 2: Update Directly from the Watch

    1. Connect to Wi-Fi:
      • Settings > Connections > Wi-Fi > Connect
    2. Open Settings on the Watch:
      • Press the Home button > Settings icon
    3. Navigate to Software Update:
      • Settings > Software Update
    4. Check for and Install Updates: Follow on-screen instructions.

    Troubleshooting Tips

    • “Update Failed”: Check battery, restart devices, ensure strong Wi-Fi.
    • Update Not Available: May be region-specific or phased rollout.
    • Stuck Download: Restart both devices; try a different network.
    • Factory Reset as Last Resort: Only if all else fails.

    Personal Insight

    Once, I had an update stuck mid-download. Restarting didn’t help, but moving closer to the router made a difference. Another time, a new feature didn’t appear until I rebooted the watch. Moral of the story? Don’t underestimate the basics.

    Conclusion

    Updating your Galaxy Watch is a simple but essential step. Whether via the Galaxy Wearable app or directly from the watch, follow these instructions to enjoy the latest enhancements.

  • How to Fix Samsung Galaxy Phone Stuck on Logo

    How to Fix Samsung Galaxy Phone Stuck on Logo

    A Samsung Galaxy phone stuck on its logo during startup is frustrating, but not uncommon. This issue, known as a “boot loop,” typically points to a software problem, though hardware faults can occasionally be the cause. If your device is frozen on the Samsung logo, don’t worry—there are several methods to get it back up and running.

    Step 1: Force Restart (Soft Reset)

    This is your first line of defense against minor software hiccups.

    How to do it:

    • Press and hold Volume Down + Power simultaneously for 10-20 seconds.
    • The device should vibrate and restart. If it boots successfully, you’re good.

    Why it works: It forces the device to reboot, clearing temporary glitches without data loss.

    Step 2: Charge and Retry

    Sometimes, the phone might simply be too drained to complete the boot process.

    Steps:

    • Plug into a wall charger using the original cable.
    • Let it charge for at least 30 minutes.
    • Try the force restart again.

    Tip: A critically low battery might not show a charging icon immediately.

    Step 3: Boot into Safe Mode

    This disables third-party apps that could be causing the issue.

    How to enter Safe Mode:

    1. Force restart the phone.
    2. When the Samsung logo appears, release Power but keep holding Volume Down.
    3. Release once the phone fully boots. You should see “Safe mode” on the screen.

    Next steps:

    • Uninstall any recently installed or updated apps.
    • Reboot normally.

    Step 4: Wipe Cache Partition

    Corrupted cache files can prevent normal boot.

    To wipe cache:

    1. Boot into Recovery Mode:
      • For older phones: Volume Up + Home + Power.
      • For newer ones: Volume Up + Power (or + Bixby).
    2. Navigate with Volume keys > Select “Wipe cache partition” with Power button.
    3. Confirm and reboot.

    Note: This won’t delete your personal data.

    Step 5: Factory Reset (Warning: Data Loss)

    This should be your last resort if nothing else works.

    Steps:

    1. Enter Recovery Mode (see Step 4).
    2. Choose “Wipe data/factory reset.”
    3. Confirm action.
    4. Select “Reboot system now.”

    Caution: All your data will be erased.

    Step 6: Flash Stock Firmware (Advanced)

    This method reinstalls the operating system using a PC and Odin.

    You’ll need:

    • Odin tool
    • Samsung USB Drivers
    • Correct firmware (SamMobile or Frija are good sources)

    Steps:

    1. Boot into Download Mode:
      • Most models: Volume Down + Bixby + Power.
      • Press Volume Up to continue.
    2. Connect to PC. Odin should detect the phone.
    3. Load firmware files into Odin (BL, AP, CP, CSC).
      • Use the CSC file (not HOME_CSC).
    4. Click “Start.”
    5. Wait for the “PASS!” message. Phone will reboot.

    When to Seek Help

    If none of these steps work, the problem could be hardware-related.

    Consider:

    • Contacting Samsung Support if under warranty.
    • Visiting a trusted repair technician for diagnosis.

    A stuck logo doesn’t mean your phone is dead. Most boot loops can be resolved with patience and the right steps. And don’t forget—regular backups are a lifesaver.

  • How to Recover Photos If iPhone Was Reset

    How to Recover Photos If iPhone Was Reset

    If your iPhone was reset—either accidentally or during troubleshooting—you may have lost access to your photos. This can be stressful, especially if the pictures were personal or irreplaceable. I’ve personally helped friends and family in similar situations, and I’ve gone through multiple recovery methods to restore data after an iPhone reset.

    The good news is that recovering photos after an iPhone reset is possible, depending on how your device was set up before the reset. In this guide, I’ll walk you through multiple methods to recover your photos, from using iCloud backups to third-party recovery tools—in simple, easy-to-understand steps.

    What Happens When an iPhone Is Reset?

    When your iPhone is reset to factory settings, all data on the device is wiped. This includes:

    • Photos and videos
    • Messages
    • Contacts
    • Apps and settings 

    However, this does not delete data from iCloud or iTunes backups, and if your photos were backed up or synced, you can recover them.

    Method 1: Restore Photos from iCloud Backup

    If you had iCloud Backup enabled before the reset, you can restore your photos along with all other data.

    What You Need:

    • The same Apple ID used on the iPhone before reset
    • A stable Wi-Fi connection 

    Steps:

    1. Turn on your iPhone and start the initial setup.
    2. On the Apps & Data screen, select Restore from iCloud Backup.
    3. Sign in with your Apple ID and password.
    4. Choose the most recent backup that was created before the reset.
    5. Wait for the restore process to complete. 

    This will restore everything, including your Photos, Messages, Notes, and Settings.

    Tip: You can check your iCloud backup status at iCloud or through another Apple device.

    Method 2: Recover from iCloud Photos

    If you used iCloud Photos instead of iCloud Backup, your photos are stored in the cloud, not the backup.

    How to Check:

    1. Go to iCloud.com and log in with your Apple ID.
    2. Click on Photos. 
    3. Browse your photo library. If you see your old photos, you can recover them. 

    To Get Photos Back on iPhone:

    1. Go to Settings > [your name] > iCloud > Photos. 
    2. Turn on iCloud Photos. 
    3. Wait for the photos to sync back to your iPhone over Wi-Fi. 

    Note: This only works if iCloud Photos was enabled before the reset. If not, this method won’t apply.

    Method 3: Restore Photos from iTunes or Finder Backup

    If you made a local backup using iTunes (Windows/macOS Mojave) or Finder (macOS Catalina and later) before the reset, you can recover everything from that backup.

    What You Need:

    • A computer where the backup was saved
    • A USB cable to connect your iPhone

    Steps:

    1. Connect the iPhone to your computer.
    2. Open iTunes or Finder (depending on macOS version).
    3. Select your device when it appears.
    4. Click Restore Backup.
    5. Choose the relevant backup (preferably before the reset date).
    6. Wait for the process to complete.

    This method will restore all your previous data, including your photo library.

    Method 4: Check Third-Party Cloud Services

    Sometimes users unknowingly or intentionally back up their photos to other cloud services like:

    • Google Photos
    • OneDrive
    • Dropbox
    • Amazon Photos

    Steps:

    1. Download the relevant app (e.g., Google Photos) from the App Store.
    2. Sign in with the email account previously linked to that app.
    3. Check the photo library within the app.

    If auto-backup was enabled in any of these apps, you might find your missing photos there.

    Tip: I once recovered an entire trip’s photos for a friend from Google Photos even though their iCloud was full.

    Method 5: Use Third-Party Data Recovery Software

    If none of the above methods work, you can try iPhone data recovery tools. These tools attempt to recover deleted files from your iPhone’s internal storage—even after a resetbut the chances of success depend on how the reset was done and if new data has been written.

    Popular Tools:

    • Dr.Fone – Data Recovery (iOS)
    • iMobie PhoneRescue
    • Tenorshare UltData
    • iMyFone D-Back

    What You Need:

    • A computer
    • A USB cable
    • The iPhone you want to recover from

    Steps (General Overview):

    1. Download and install the software on your PC or Mac.
    2. Connect your iPhone to the computer.
    3. Launch the tool and select Recover from iOS Device.
    4. Start scanning. This may take time depending on storage size.
    5. Once the scan completes, preview and select the photos to recover.
    6. Save recovered files to your computer or directly to the phone (if supported).

    Warning: Most tools offer a free trial with limited recovery. Full recovery usually requires a paid license.

    Note: If your iPhone was fully erased and overwritten, recovery chances drop sharply.

    Method 6: Restore Shared Albums from iCloud or Messages

    Sometimes, photos are saved in Shared Albums or sent via iMessage. If those are synced, you might get access again.

    For Shared Albums:

    1. Go to Photos > Albums > Shared Albums.
    2. If enabled in iCloud, your shared photos may appear again.

    For iMessage:

    1. Open Messages.
    2. Tap on the conversation with the person who shared the photo.
    3. Tap the contact name > Info > scroll down to find shared media.

    This can help retrieve specific lost photos.

    Prevention Tips for the Future

    After helping several people recover data, here are some habits I recommend to avoid permanent loss:

    • Enable iCloud Photos and iCloud Backup.
    • Use Google Photos or another cloud service for extra backup.
    • Regularly back up your iPhone using Finder or iTunes.
    • Avoid factory resets unless absolutely necessary.

    Final Thoughts

    Recovering photos after an iPhone reset depends entirely on how well the data was backed up before the reset. If iCloud Photos or a local iTunes/Finder backup was in place, recovery is fairly straightforward. Without any prior backup, your only real hope lies in third-party recovery software, which has mixed results depending on the situation.

    I’ve successfully recovered photos using iCloud and iTunes backups multiple times, and the key takeaway is this—always back up your data. Prevention is the most reliable form of recovery.