One of the most common frustrations for laptop users is a rapidly draining battery. Whether you’re working on the go, watching a movie, or just Browse, a long-lasting battery is essential for true portability. While the physical battery’s capacity naturally degrades over time, there are numerous ways to significantly increase laptop battery life by optimizing Windows settings, adjusting usage habits, and performing routine maintenance.
Understanding how your laptop battery works and what factors consume the most power is the first step. The display, CPU usage, Wi-Fi, background apps, and external peripherals are all major power consumers. By managing these elements effectively, you can squeeze more hours out of a single charge, extending your workday or entertainment time without needing to scramble for a power outlet. This guide applies to both Windows 11 and Windows 10, as many of the core power management features remain consistent.
Method 1: Adjusting Power Modes and Battery Settings
Windows offers various power modes that allow you to balance performance with battery saving.
Step-by-Step Guide (Windows 11):
- Access Power & Battery Settings:
- Right-click the Start button and select “Settings.”
- In the Settings window, click “System” in the left pane, then select “Power & battery” on the right.
- Choose a Power Mode:
- Under “Power mode,” click the dropdown.
- Select “Best power efficiency” to prioritize battery life. This mode will reduce CPU performance and screen brightness when on battery power.
- User Insight: I almost always keep my laptop on “Best power efficiency” when I’m just Browse or working on documents. The slight performance dip is barely noticeable, but the extra hour or two of battery life is invaluable.
- Configure Battery Saver:
- Scroll down to the “Battery” section and click on “Battery saver.”
- Turn on automatically at: Set a percentage (e.g., 20%) at which Battery Saver automatically kicks in. This is highly recommended.
- You can also toggle “Turn on now” to activate it immediately.
- When Battery Saver is active, it automatically reduces screen brightness, limits background app activity, and pauses syncing for some apps to conserve power.
Step-by-Step Guide (Windows 10):
- Access Battery Settings:
- Click the Start button and select Settings (gear icon).
- Go to “System” > “Battery.”
- Adjust Power Mode (if available):
- Depending on your version, you might see a slider for “Power mode” at the top of the Battery page or in the taskbar battery icon’s flyout. Slide it towards “Best battery life” or “Battery Saver.”
- Configure Battery Saver:
- Under “Battery saver,” toggle “Battery saver status” to “On.”
- Click “Battery saver settings” to choose when it turns on automatically (e.g., at 20%).
Method 2: Optimizing Display and Graphics Settings
The display is often the single biggest power hog on a laptop. Reducing its power consumption significantly impacts battery life.
Step-by-Step Guide:
- Lower Screen Brightness:
- Quick Settings (Windows 11): Click the network/volume/battery icons in the taskbar. Adjust the brightness slider.
- Action Center (Windows 10): Click the notification icon in the taskbar. Use the brightness slider.
- Settings: Go to Settings > System > Display. Adjust the “Brightness” slider. Lowering it even a little can make a difference.
- Shorten Screen Turn-off Time:
- Windows 11: Settings > System > Power & battery > “Screen and sleep.” Set shorter times for “On battery, turn my screen off after” and “On battery, put my device to sleep after.”
- Windows 10: Settings > System > Power & sleep. Set shorter times for “On battery, turn off after” and “On battery, PC goes to sleep after.”
- Use Dark Mode:
- Windows 11/10: Settings > Personalization > Colors. Choose “Dark” for your Windows mode and app mode. Dark mode consumes less power on OLED displays because black pixels are turned off, but it still offers some minimal savings on LCDs by reducing overall light emission.
- Reduce Refresh Rate (if applicable):
- If your laptop has a high-refresh-rate screen (e.g., 120Hz, 144Hz), lowering it to 60Hz when on battery can save power.
- Windows 11: Settings > System > Display > Advanced display. Change the “Refresh rate.”
- Windows 10: Settings > System > Display > Advanced display settings > Display adapter properties > Monitor tab. Change “Screen refresh rate.”
Method 3: Managing Background Apps and Startup Programs
Apps running in the background and programs launching at startup consume CPU cycles and RAM, draining your battery even when you’re not actively using them.
Step-by-Step Guide:
- Limit Background Apps (Windows 10):
- Settings > Privacy > Background apps.
- Toggle “Let apps run in the background” to Off, or selectively turn off apps you don’t need running constantly.
- Note: Windows 11 handles background apps more dynamically, often restricting them automatically in Battery Saver mode.
- Disable Startup Programs:
- Task Manager: Press Ctrl + Shift + Esc to open Task Manager. Go to the “Startup” tab.
- Right-click on any unnecessary programs that launch with Windows and select “Disable.” Be cautious not to disable critical system processes.
- Manage Notifications:
- Excessive notifications can wake your screen and consume power.
- Windows 11: Settings > System > Notifications. Turn off notifications for apps you don’t need alerts from.
- Windows 10: Settings > System > Notifications & actions. Disable notifications for individual apps.
Method 4: Optimizing Connectivity and Peripherals
Wireless connections and connected devices consume power, even when idle.
Step-by-Step Guide:
- Turn Off Wi-Fi and Bluetooth When Not Needed:
- Quick Settings (Windows 11): Click the network/volume/battery icons in the taskbar and toggle off Wi-Fi and Bluetooth.
- Action Center (Windows 10): Click the notification icon and toggle them off.
- If you’re not actively using the internet or Bluetooth devices, disabling these radios can save noticeable power.
- Disconnect Unused Peripherals:
- USB drives, external hard drives, webcams, and other USB-powered devices draw power from your laptop. Disconnect them when not in use.
- Consider Airplane Mode:
- If you’re on a flight or don’t need any network connectivity, Airplane mode completely disables all wireless radios, providing maximum battery savings.
- Quick Settings (Win 11) / Action Center (Win 10).
Method 5: Software Updates and Driver Management
Outdated or buggy drivers can cause hardware to consume more power than necessary. Keeping Windows and your drivers updated is important.
Step-by-Step Guide:
- Update Windows:
- Windows 11: Settings > Windows Update. Click “Check for updates.”
- Windows 10: Settings > Update & Security > Windows Update. Click “Check for updates.”
- Windows updates often include power management improvements.
- Update Device Drivers:
- Visit your laptop manufacturer’s support website (e.g., Dell, HP, Lenovo, Asus, Acer) and download the latest drivers for your specific model, especially for chipset, graphics card, Wi-Fi, and power management. Outdated drivers can lead to inefficient power usage.
- You can also use Device Manager (right-click Start > Device Manager) to check for driver updates, though manufacturer websites are often more reliable for specific hardware.
Method 6: General Usage Habits and Battery Health
Beyond settings, your daily habits play a significant role in battery longevity and per-charge battery life.
Tips for Usage and Health:
- Avoid Extreme Temperatures: Lithium-ion batteries (used in most laptops) degrade faster in extreme heat or cold. Avoid leaving your laptop in direct sunlight, hot cars, or very cold environments.
- Don’t Always Charge to 100% or Drain to 0%: For optimal battery health, try to keep your charge level between 20% and 80%. Many modern laptops and Windows 11 have features (like Smart Charging or Battery Limit) that allow you to set a charging threshold (e.g., stop charging at 80%) to prolong the overall lifespan of the battery.
- Windows 11 Smart Charging: Settings > Power & battery. Look for “Battery charging optimization” or similar.
- Manufacturer Software: Check your laptop manufacturer’s pre-installed software (e.g., Dell Power Manager, Lenovo Vantage, HP Support Assistant) for battery health management features.
- Close Unused Programs and Browser Tabs: Each open application and browser tab consumes resources. Close what you’re not actively using.
- Use Energy-Efficient Browsers: Browsers like Microsoft Edge are often optimized for Windows and can be more battery-friendly than some alternatives.
- Reduce Visual Effects:
- Windows 11/10: Search for “Adjust the appearance and performance of Windows.” In the “Performance Options” window, select “Adjust for best performance” or manually uncheck effects like “Animate controls and elements inside windows,” “Fade or slide menus into view,” etc.
- Run a Battery Report:
- To get detailed insights into your battery’s health and usage history:
- Open Command Prompt as an administrator (search for “cmd”, right-click, “Run as administrator”).
- Type powercfg /batteryreport and press Enter.
- An HTML file will be generated in C:\Users\YourUsername\. Open this file in your browser to see battery capacity over time, recent usage, and more. This can help identify if your battery itself is degrading.
- To get detailed insights into your battery’s health and usage history:
By systematically applying these methods, you can significantly increase the usable battery life of your Windows laptop, ensuring it stays powered longer when you’re away from an outlet.
Frequently Asked Questions (FAQ)
Q: What is the biggest drain on my laptop battery?
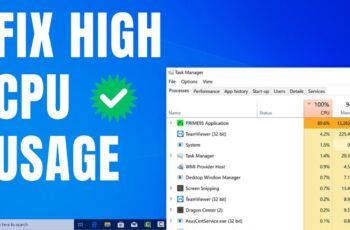
The display (screen brightness) is typically the biggest drain on a laptop battery. Other major consumers include the CPU (especially during demanding tasks), Wi-Fi and Bluetooth radios, and background applications.
Q: Does dark mode actually save battery life in Windows?
Dark mode can save a noticeable amount of battery life on OLED displays because black pixels are truly off and consume no power. On traditional LCD displays, the savings are minimal as the backlight is always on, but it can still reduce overall light emission slightly.
Q: Should I completely drain my laptop battery before recharging it?
No. For modern lithium-ion batteries, completely draining the battery to 0% and then fully charging it (a “full cycle”) can actually accelerate degradation. It’s generally recommended to keep your battery level between 20% and 80% to maximize its overall lifespan.
Q: What is “Battery Saver” mode in Windows?
Battery Saver is a Windows feature that automatically conserves battery power when your laptop’s charge drops below a certain percentage (e.g., 20%). When active, it automatically reduces screen brightness, limits background app activity, and pauses email and calendar syncing to extend usage time.
Q: How often should I update my laptop’s drivers for better battery life?
It’s a good practice to check for driver updates every few months or if you notice unusual battery drain or performance issues. Key drivers like chipset, graphics, and Wi-Fi often include power management optimizations. You can find the latest drivers on your laptop manufacturer’s website.
Q: Does disabling Wi-Fi and Bluetooth really make a difference to battery life?
Yes, absolutely. Your laptop’s Wi-Fi and Bluetooth radios are constantly searching for networks and devices, which consumes power. If you are not actively using these connections, turning them off (especially Wi-Fi when offline) can provide noticeable battery savings.
Q: Can a faulty battery be the reason for poor battery life, even with optimized settings?
Yes. Over time, all rechargeable batteries degrade. If your laptop battery life has significantly reduced despite all optimizations, and your battery report (generated via powercfg /batteryreport in Command Prompt) shows a much lower “Full Charge Capacity” compared to its “Design Capacity,” your battery may be nearing the end of its useful life and might need replacement.